How To Make Your Own Cross Draw Knife Sheath? As a start, I’ll show you all the tools and gadgets I’ll need. In order of left to right:

- Impact adhesive
- Polishing brush
- Artificial sinew
- Small paintbrush
- Shoe polish
- Scalpel
- Edge-beveller
- Stitch marker
- Ballpoint
- Small clamps
- Edge Kote
- Dying bobbin, dye
- Embossing punch
- Homemade liner/burnisher
- Sharp punch
- Hammer
- Needle
- Knives for the sheaths!
There’s a lot there, as you can see! Many of these items can be made by you if you are just starting out. The Edge beveller and a stitch marker are two tools everyone doing leatherwork should own. It makes all the difference when the edges are finished & the seams are neatly sewn!
Related: Best Horizontal Carry Fixed Blade Knives
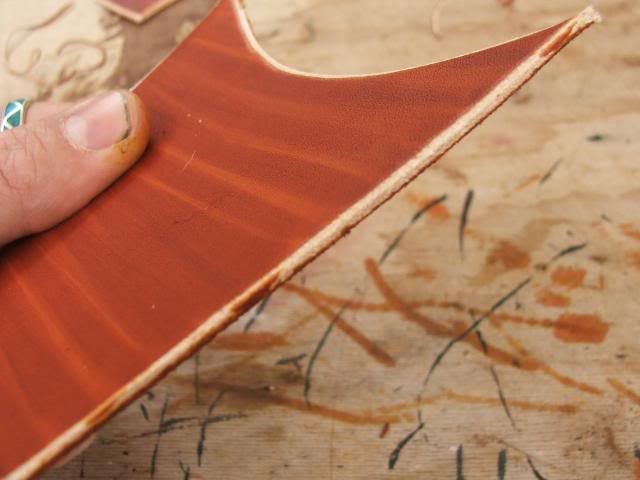
That was my first job. Using the knife, I lay the blade out on a piece of leather (3/32′′ Veg Tan Side) and trace around the blade, leaving 1/2′′ or so around the blade. Remember, the knife’s widest part has to correspond with the sheath’s widest part.
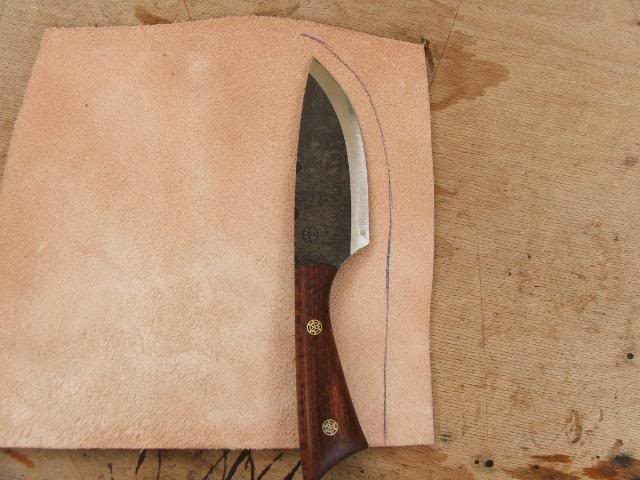
Do the same thing with the other side of the knife.

Then, I fold over & mark the second half to avoid cutting out the whole shape at this point.


Is that clear to you?
My first mark is never to be trusted! I learned that a while ago. I’ve found this to be the best way to compensate for the thickness of the handle since it’s hard to judge.
Stay tuned.
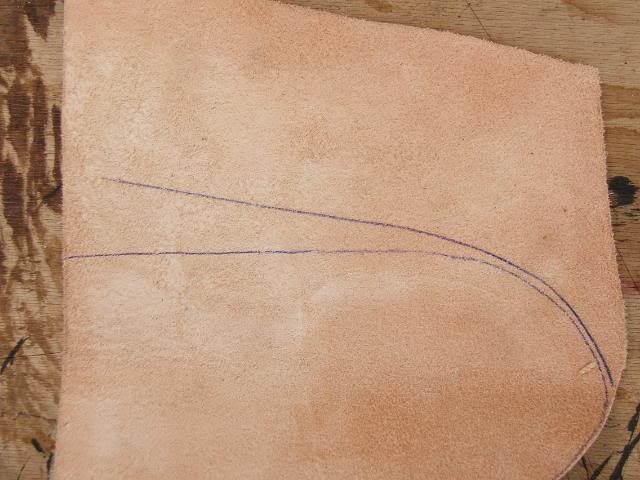
Cut out the shape carefully according to the lines once the final outline has been marked. It is possible the top line of the sheath may have a funny angle; just square it off and you are ready for the next step.
To make it easier to access the knife at the top of my cross draws, I like to keep it slightly recessed back.
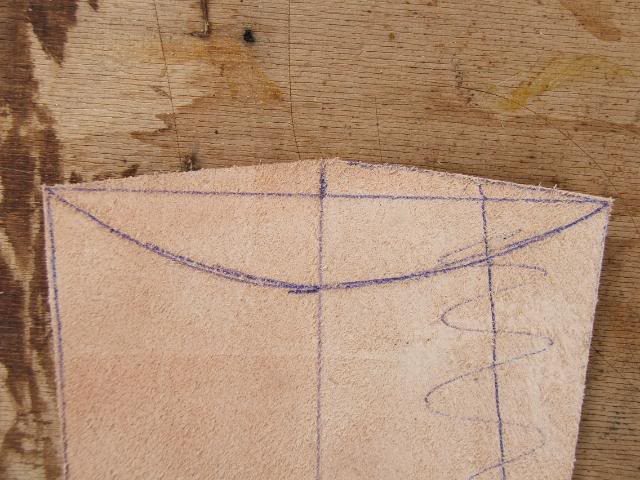
My layout is shown below. I draw a horizontal line across the open end as well as a centreline down the sheath (all markings are done on the inside). In the middle of this horizontal line, I mark 1 inch into the sheath and draw a nice sweeping curve through my mark. As such.
This needs to be cut out and the knife needs to be fitted again.

The knife will fit snugly in the sheath if you clamp it at this point. Alternatively, you may trim your sheath’s sides if you don’t want your knife to be too loose. Make sure you are very careful! A difference of 1/8″ can be huge!

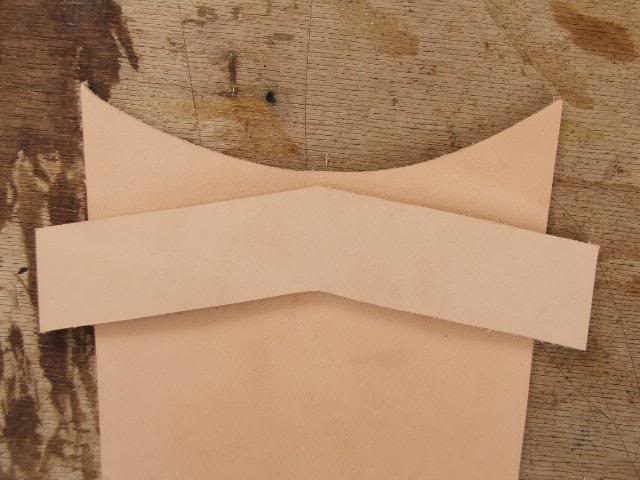
The belt loop can now be laid out. Pictures are much easier to understand than words!

Test fit it again by clamping it again.

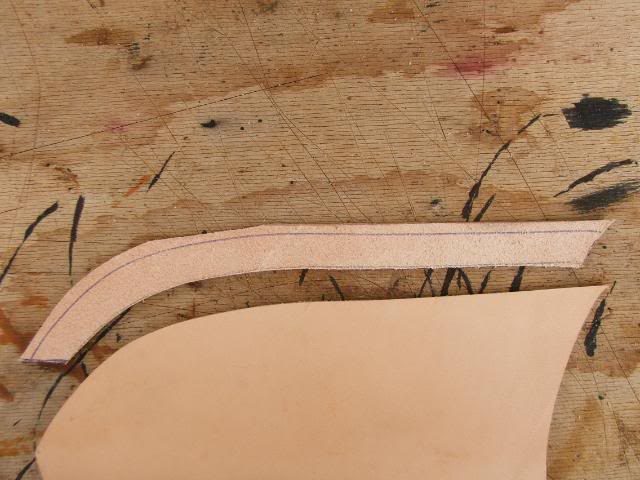
Lastly, the welt needs to be cut out. To begin with, I like my sheath edge to protrude slightly from the sheath. As we proceed, I will explain that better.
All the parts have been cut and are ready to be assembled.
Firstly, they need to be dyed. This is done with Feibings dyes. I love how easy these are to use, you can mix your own colors, and they dry in just an hour.I love how easy these are to use, you can mix your own colors, and they dry in just an hour.
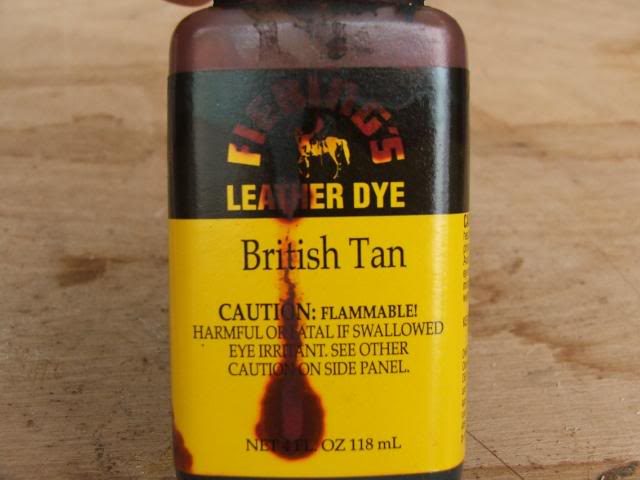
This should be available in the US through Tandy.
Applying dye with the bobbin results in even, slightly overlapping strokes that give the fabric a nice streaked look (to my eye, at least). While this may appear rather harsh at this point, as the remaining stages are completed, it will gradually blend into the background.

Make sure you dye inside the sheath and the belt loop as well! During a cross-draw, you can easily see the dyed top inch or two of the welt.
After it dries, I’ll be back
Let’s bevel those edges once the dye has dried! This is always the first thing I do after dying, in order to make shaving the edges that much easier. It is sufficient to make a light pass with the tool without exerting too much pressure. You’re just knocking the top edge back, so don’t try to take too much off.

Completed.
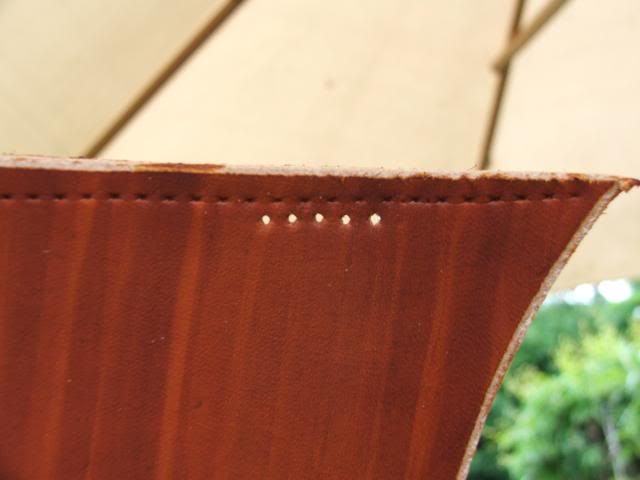
The stitching can now be marked out. My experience has been that dampening the leather helps it last longer. A nearly dry cloth can be dampened without getting wet.
You want to stitch through the welt rather than inside it, so mark where you want your stitches to run. Don’t stitch too close to the edge. The front side should be followed (the side that will be away from your body).

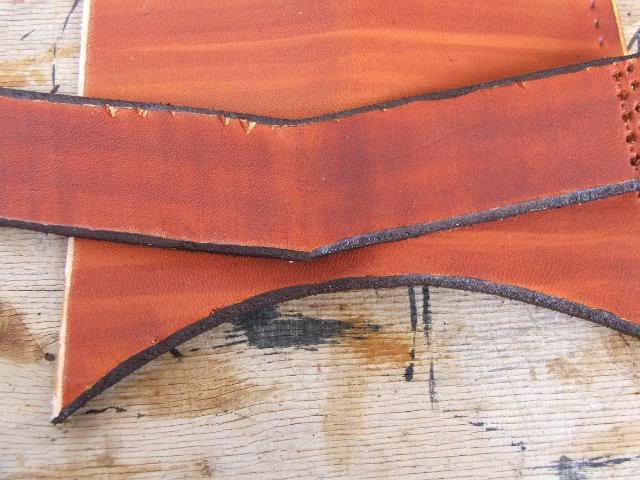
In order to make the belt loop, you will need to mark it out.

Two lines of stitching should be run through this, for two reasons: A) it should remain straight and solid, and B) it should be strong. Alternating my stitches is my favorite thing to do. The marks on the loop should be punched through.

Punch through both layers of leather on the top row of stitching, only after laying the loop on top of the sheath.

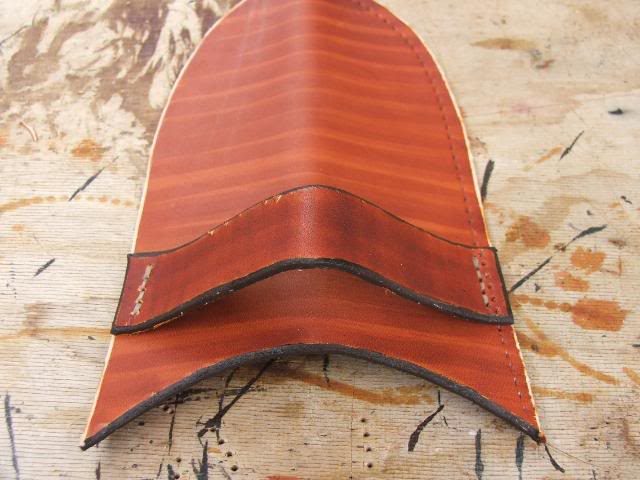
After folding the loop exactly in half & punching the top holes, you are ready to use it…


Then dampen the loop edge & top edge of the sheath & lightly coat them with Edge Kote. If you are cutting a bevel, make sure that you come up both sides of it…
The loop needs to be sewn to the sheath next. The upper line of stitches is the only area we are interested in at the moment. In all my work, I double the running stitch. When you reach the last hole, reverse the stitch direction and stitch the way back up in the opposite direction. This is what it will look like when it’s done…

Make a loop on both sides to get this…
During the embossing, I forgot to attach the loop before embossing. *Attach the loop after you’ve engraved, stamped, or embossed if necessary!*
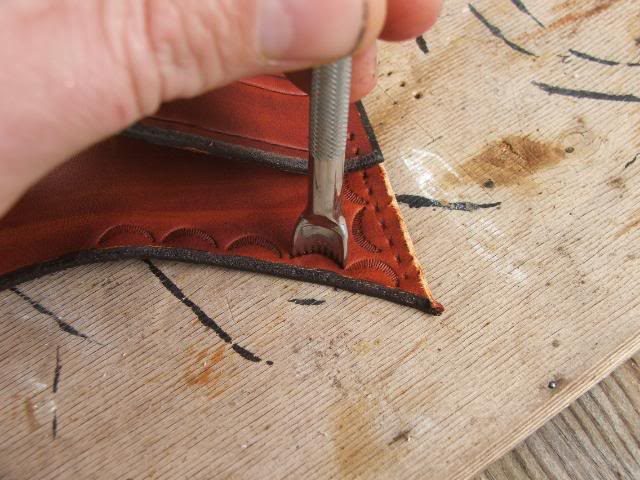
This is a simple idea, but if it’s done well, it looks fantastic. You can create your design by dampening the leather and using your choice of embossing stamp. The scallop I like to use is just inside a line, and I like to keep mine simple. A teaspoon handle works admirably for straight lines! I have a homemade tool, but a spoon handle works well too!
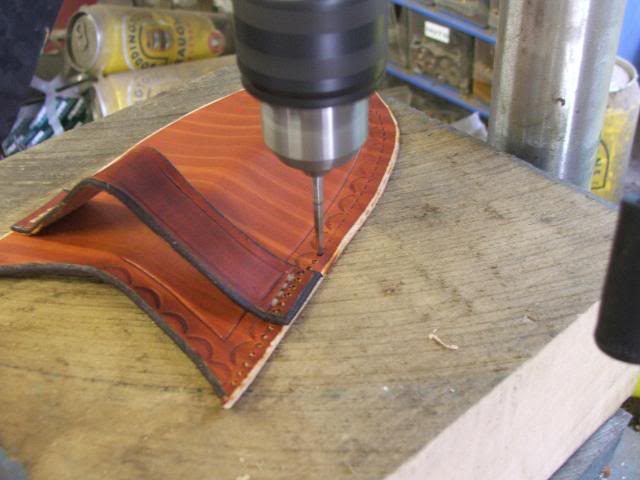
Punching out our stitching holes is the next step. Rather than making a stainless pin, I made a drill press-compatible pin. By using it, I can avoid cramping up my hands and keep all my stitches neatly in line.
Gluing on the welt is the next step. Impact adhesive is what I use for this. The outside of the sheath should have a little overhang. Glue to the line & leave a little overhang.

After that, it’s time to go back to the drill press and drill your previous holes and go through the welts.
Drilling/punching can be left until everything is glued up, but I find that the holes move around a little as the glue dries.

The welt will now be trimmed to match the outer sheath…

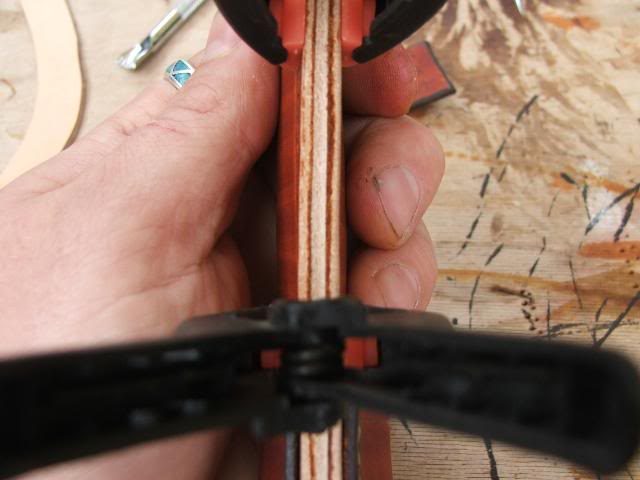
From back to front, flip the sheath over to see how everything lines up. Once you’re satisfied, apply more glue to the welt & sheath, fold them over, and clamp them together.
After the stitching and final finishing, you should now have a ready-to-use sheath.
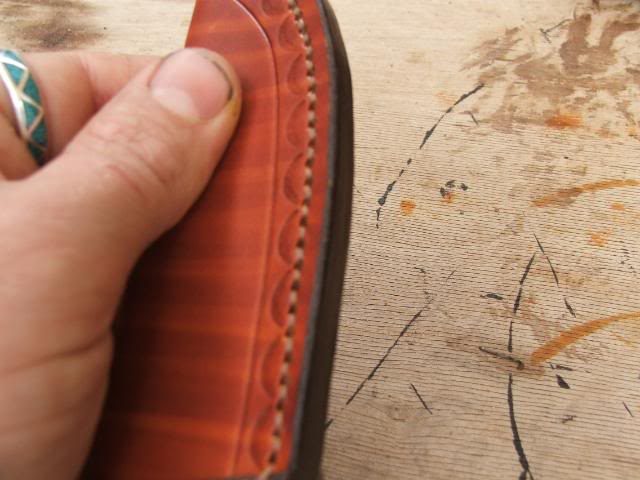
Getting back into the work cave, I use the belt sander to smooth & flatten the edges (along the welt seam)…
This is a pretty good way to do it, but be aware that the sander can move the leather very, very fast. Apply virtually no pressure while going very slowly & carefully.


Here we go again with needlework!
All my sewing these days is done with 70# artificial sinew. My preference is to work with it rather than cotton, but your mileage may vary. To make sheaths, I split the sinew into thirds.
In order to complete the sheath, we need to sew it up. Keep your stitches neat, hide your knots, take your time and take your time! Stitching begins and ends between the welt and the sheath’s back layer. Although it’s fiddly, I don’t appear to have any knots…
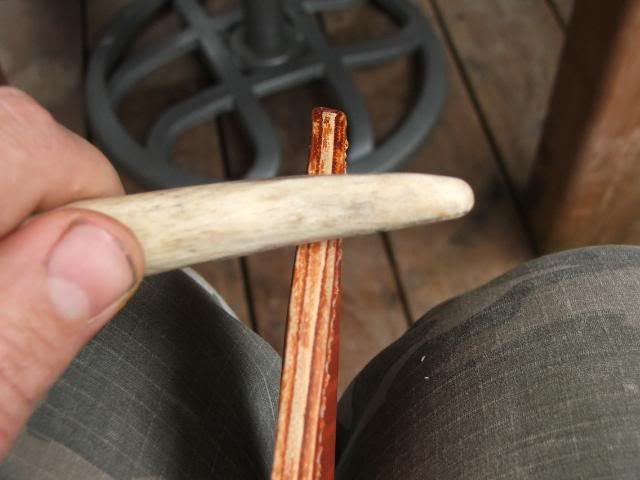
Burnishing the edge after we’ve sewn everything up is one of my favorite things to do. Basically, it smoothes down the little whisps of leather and polishes the edges. The edge needs to be dampened. If you lick it, it seems to work the best (the enzymes in saliva bond the leather to a certain extent and leave it with a hard finish).

A piece of polished antler should then be rubbed up and down the edge briskly, using moderate pressure.
Once you’ve passed a few times, the edge will actually start to shine. Using Edge-Kote, we can give your edge a final finish once you’re happy with it.
That’s all there is to it! Simply brush on some clear shoe polish, buff to a nice shine & that’s it! (This takes a lot less time than photographing & describing, I promise you!)
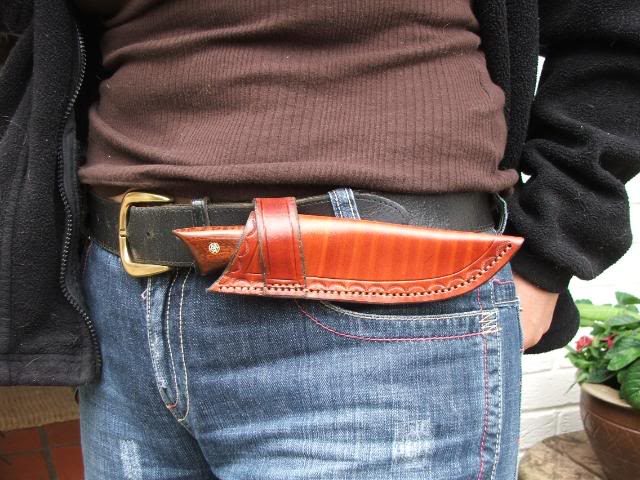
A picture of my wonderful wife of mine, wearing it.